Loupedeck Plus Raises the Bar on Lightroom Workflow | Tech Tuesday
When there’s a catalog of 3,000 photographs to be processed, being able to say something like “Loupedeck Plus raises the bar on Lightroom workflow” can be a game-changer. Even if it’s just a fraction of a second saved using a new tool and more refined workflow, this can add up to hours and hours of time saved over the course of a season. Especially when the tool, Loupedeck + in this case, works on all sides of the process. Early-in, Loupedeck + DOES seem that it WILL be a game-changer.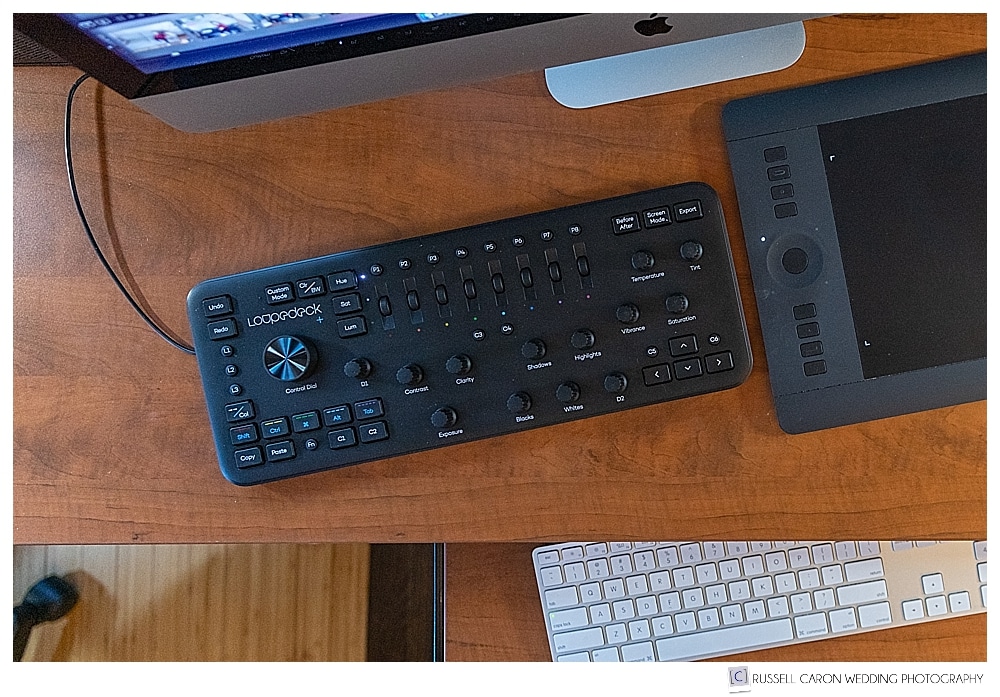 Like magic, Loupedeck + knows which of Lightroom’s module you’re working in. Its dials work intuitively and can have unique roles within each module.
I’m writing this post with under an hour’s experience with this editing console, and already am sold on its virtues. Yes, I have been a fan of my previous editing key setup, Palette. You can read about that at: Palette Gear For Post-processing Workflow. I still like the Palette keys, and the early very buggy Palette software has been improved greatly.
But I realize good ideas can be made greater, and such is the case with the Loupedeck + console. As a bonus, at $249USD, the Loupedeck investment is very reasonable. It costs less than the Palette system did when I initially purchased that system in 2015… by $50. That’s for the mid-scale Palette system I was using. It would be much less than a Palette system that would have all the features of the Loupedeck +. Here’s the good thing: we now have even more choices. For sure, the Palette system allows more physical reconfiguration than does Loupedeck. For me, I am certain that the placement of each of the knobs I most use will become totally intuitive.
Unpacking The Loupedeck Plus
When the Loupedeck Plus arrived the quality of what’s inside the box was reflected by the really high-quality packaging. That of course doesn’t necessarily mean the hardware inside is going to be of equally-high quality. But, I can say in this case that it IS, and then some.
Loupedeck Plus Essential Features
After unpacking, there’s a simple quick-start ‘essential features’ overview. Download the User Guide (i’m going to recommend printing it now!) and the Loupedeck software (Mac and Windows). You’ll be forewarned to not plug in the USB cable until the Loupedeck software has been installed. A quick note: The user guide says setting up is as easy as 1-2-3. It lists these three steps: (1) Download the software, (2) Connect the USB, and (3) start editing!. My experience at (3) was that the Loupedeck was not responding. Rebooting, however, remedied this. So setting up, for me, was as easy as 1-2-3-4. Overall, very seamless and just a very few minutes to get to this point.
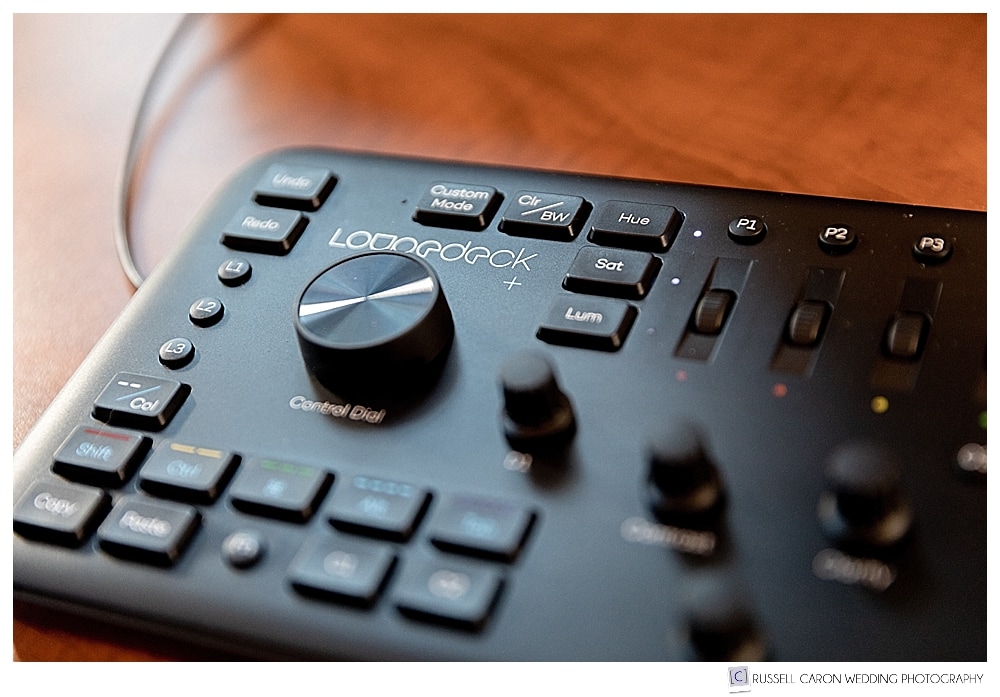
There are several user-programmable dials, knobs and pushbuttons. I immediately wanted to see what function was set for dial D2. I then wanted to program that dial to address “Noise Reduction”. A quick peek at page 17 sent me to > Lightroom > Help > Plug-in Extras > Update Develop Presets List. The rest was very intuitive.
Favorite Features of Loupedeck Plus
Already a favorite feature of mine are the simple four arrow keys in the lower right of the panel. In Library mode, navigating through in the grid view is very quick. I can sense substantial time savings already. Sure enough. these same keys and functions are on a standard keyboard. But, that keyboard’s not any longer in relative close proximity. Efficiency and ergonomics are all about having the frequently-used buttons, knobs, and dials in close reach. And, not too packed together. Loupedeck does this especially well. The large, smooth-running main control dial whisks through the grid or filmstrip at however fast you want to turn it.
There’s another cool thing I have found right away. Let’s say you’re culling in Library mode and come across an image you may want to pick as a keeper. That image, though would need some exposure adjustment. Turn the ‘exposure’ knob (others, too, if needed) on the Loupedeck. It responds exactly as would the associated controls while the Develop module, but Lightroom STAYS in Library mode. This is HUGE, as it saves having to step out into Develop and then back into Library to continue culling. I say this because I never adapted to using the Quick Develop modules in Library. I always preferred the more refined Develop module adjustments.
Loupedeck Plus Take-away
Loupedeck promises to have a plethora of useful features. Some of them, I suspect, are “hidden” and will manifest themselves over the course of time. I’m fortunate my photographer brother R.L.Caron (web site) in Florida has had his Loupedeck a couple of weeks longer than I have. Oh, and he’s a tech guru. I expect many of these tricks and tips will be contributed by him. So, stand by. Lots of great information will follow with future updates to this post.
Hi Russ, thanks for sharing. Truthfully, Loupedeck wasn’t even on my radar, though it will be now.