Better iPhone Photos in 3 Easy Steps
It would probably be staggering to know how many millions of photos are taken with smartphones every single day all over the world. Who knows, the number is probably in the billions. The number is far more with smartphones than with dedicated cameras. Justifying all those photos being taken with your “phone” is the fact that camera in your iPhone or smartphone is indeed really amazing and sophisticated in its capabilities. Here we tell you how to take better iPhone photos in just 3 easy steps. In fact, it absolutely needs to be considered as a serious photographic device. Therefore, we can apply some of the basic rules of composition, understanding light, and simple adjustments to result in even better photographs. Think of this as the smartphone takes the “pictures” but with a little knowledge and intervention, you can elevate this to taking (or making) “photographs”. We’ll use the term “iPhone” in the following but just about everything applies equally to Samsung and other brand smartphones and apps.
THREE SIMPLE IMPROVEMENTS YOU CAN MAKE TO TAKE BETTER iPHONE PHOTOS:
- Composition:
Use the “Rule of Thirds” to add interest, especially for landscape and scenic photos. Not so much for portraits and selfies, though.
Imagine a “tic-tac-toe” grid over your screen. Wait! You don’t have to imagine it, you can actually do this with your iPhone: Go to Settings, Photos & Camera, and turn on ‘Grid’. It’ll look quite a bit like the screen shot, below.
Then, what to do with the grid?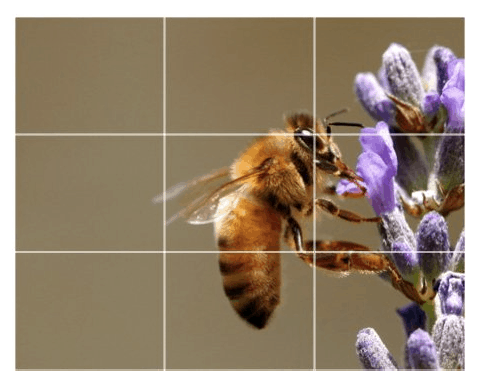 The idea is to place the important part of your photo at one of the intersections of the grid, like the bee’s eye in the above example. Experiment with this and see if you don’t agree that suddenly your photos have an artistic look to them. Also use the grid to help you keep the view square and horizon lines straight. Of course, rules are meant to be broken, including this one, and there are PLENTY of times centering your subject in the image area is completely fine and in fact more pleasing, like portraits and selfies.
 - Turn, when you can, so the light falls onto your subject/s instead of the light being behind it. Stand so the light source is behind you and let the light flow onto your subjects. If your subject have bright light behind them your camera will compensate for this and your subjects will be silhouettes. If that is the intent, fine, but we see countless people photos as silhouettes when that wasn’t the intent.
- Adjust / fine-tune the light level using your iPhone’s exposure setting right on the screen:
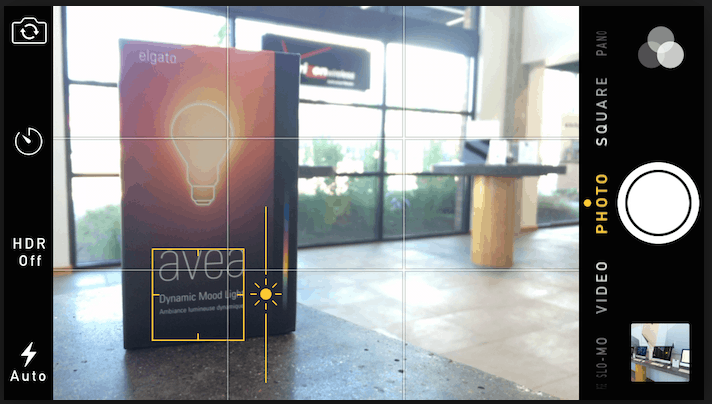
Tap the main area of importance in your image. (Note the photographer above also nicely used their Rules of Thirds…) Then slide the “sun” icon up and down on the scale and see the exposure improve on your main subject. Once it’s just right, take the photo. The area tapped is also the area the camera will use for the primary focus point.
AND THERE ARE MORE WAY TO TAKE BETTER iPHONE PHOTOS!
- Use a more sophisticated camera app instead of the built-in camera app. Try VSCO Camera, it’s free from the App Store.
- Use a capable post-image processor, even before going to a social media app like Instagram that allows filters. My favorite post-processing app for in-camera use for the iPhone is Snapseed.
Here is a favorite photo I processed using Snapseed:
 In the above example, the image was adjusted a bit for saturation and detail in the sky, exposure, and cropping. The composition is similar to Rules of Thirds but intentionally even more dramatic, with a large expanse of sky and the bridge in the bottom right corner.
This is an example of an image using additional in-phone software and was taken with an iPhone 6Plus.

Above: Tripod-mounted iPhone 6+. Post-processing outside of camera in Adobe Lightroom and Photoshop CC. Location: Old Orchard Beach, Maine.
Like everything in photography and in life, practice will constantly improve the results. It’s suggested you get some of these free apps for your iPhone and start playing with them. Also this is a good time to mention to be sure your phone is set up to back up your photos to either or both of iCloud or Dropbox or similar.
There you have it, three easy ways to take better iPhone photos, and a few more bonus tips, too! Now get out there and experiment!