Fill Flash for Outdoor Situations | Technical Tuesdays
Knowing when to use fill flash can save the day! Have you ever tried to photograph something in deep shade in the foreground with something brightly lit in the background…desiring proper exposure on both areas? This can be a very tricky proposition. We thought of this as a great example with a fairly easy solution using a minimal amount of equipment.
Let’s say the assignment is to get a photograph of this beer bottle with both the background and the bottle properly exposed. Assume for this example you have to do this now and cannot wait for the light to soften or become more balanced. If you were to expose for the background as in the picture example on the left, the bottle is of course deeply underexposed. If you add exposure compensation and thus achieve the proper exposure for the bottle, as in the photo on the right, the background, as expected, becomes blown out.
What to do in a case like this? It’s easy, you need to use fill flash.
The photo below shows the final image. The discussion that follows is our step-by-step for how we achieved the result.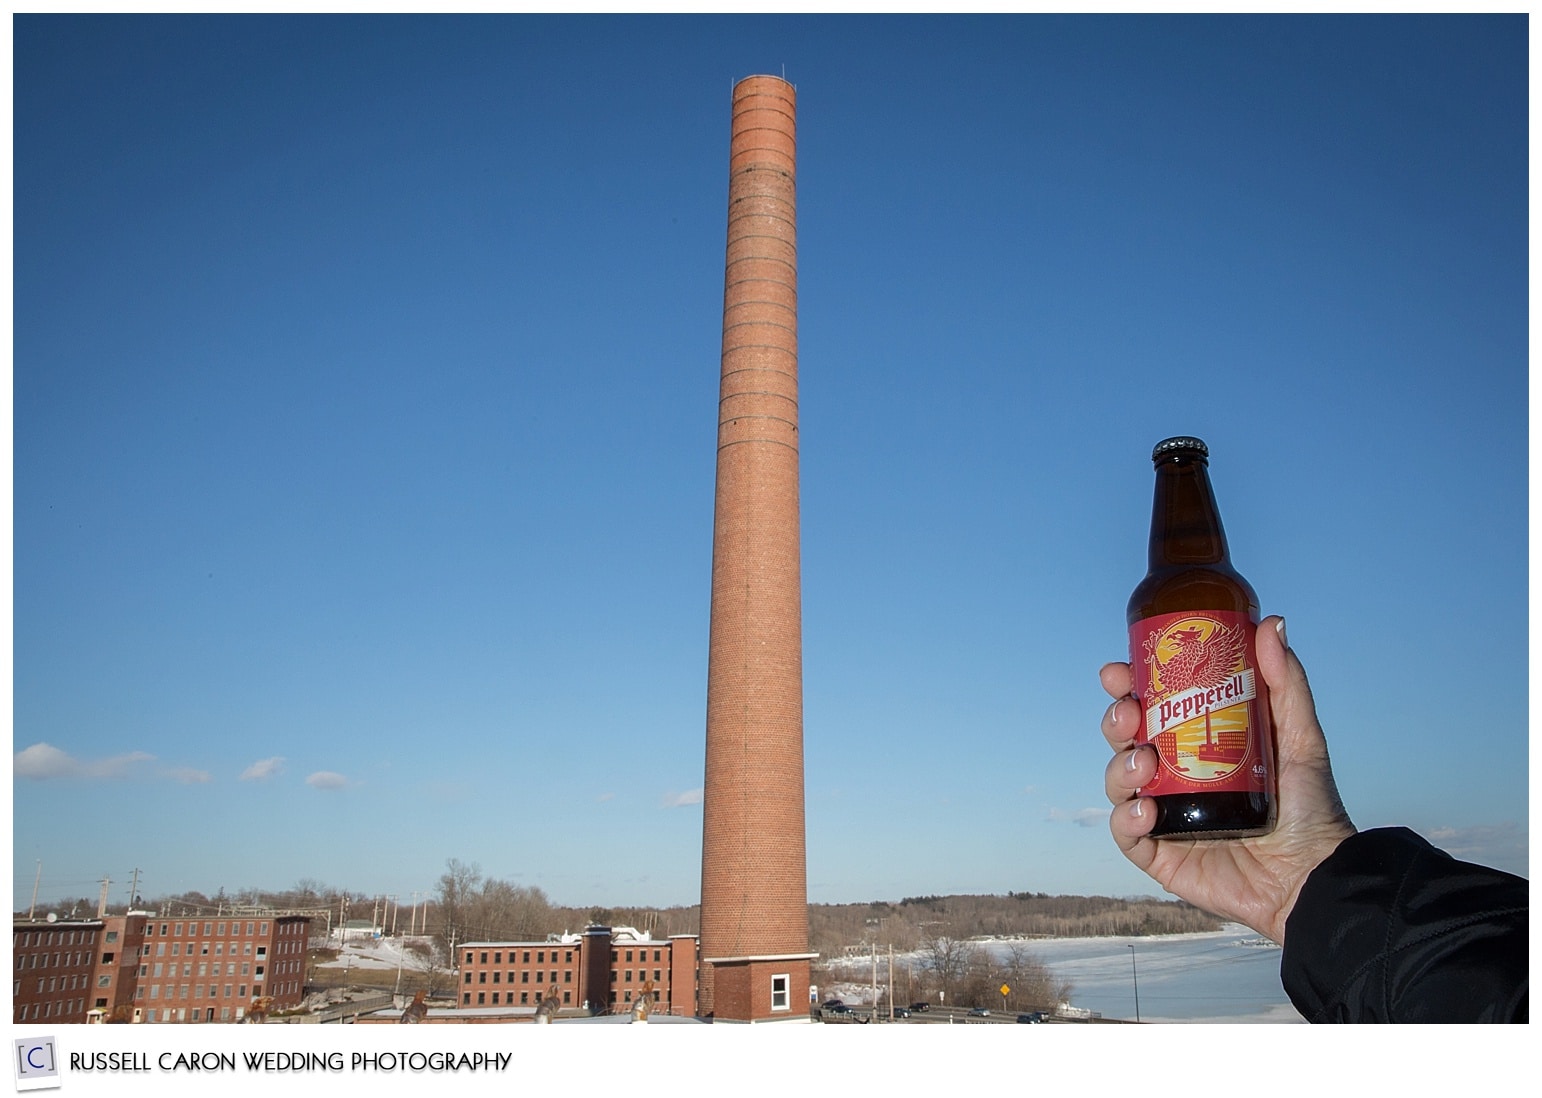
1. With the camera on manual, the shutter speed was set to the maximum sync speed that can be used with flash, which on my Canon 5D MkIII is 1/200th second.
2. Knowing that a high amount of depth of field was needed, next we chose f/22 as the aperture.
3. The last variable, ISO, was then selected to achieve proper exposure of the background. A couple of test shots confirmed that we have established the proper background exposure using, in this case, ISO640.
4. Attach a flash to the camera, and also set the flash to manual power. I used a Canon 600EX-RT. I actually used my 600 off-camera and fired it using the Canon ST-E3 transmitter but using an off-camera flash and transmitter is purely an optional step. This results would have essentially been the same had I mounted the flash to the camera instead of to my ever-so-handy Manfrotto “Justin” clamp. (Ultimately I may have had a tad more freedom in pointing the flash by having it off-camera but again, you can do the very same thing with it mounted to the hot shoe.)
5. As mentioned in #4, the flash was in full manual mode. Starting with a guesstimate, set the power level and make a test shot. I started a little too low but on the second test shot, where I moved the power up to 1/16th; at the approximately 4′ flash-to-bottle distance, the exposure was right on. That’s it. No tricks, no combining images in post-production, just a clean, simple shot right from the camera with great exposure in what otherwise would have been a difficult and high contrast situation.
Think of the possibilities of this simple setup when shooting at the beach this summer with your subject in the shade and the glaring ocean and sun behind them.